Estimated reading time: 13 minutes
Key takeaways
- Embed reporting directly into WinForms and WPF without building a custom reporting subsystem from scratch.
- Keep data access, security, and business rules inside your application while exposing only the schema reports actually need.
- Support interactive design, preview, print, and silent export from the same reporting engine.
- Centralize templates and assets with a repository when local project files stop scaling.
- Use short-lived ListLabel instances and a shared reporting service to keep integration predictable and maintainable.
Table of contents
- What a “full reporting system” actually means
- What List & Label does and where it fits
- Integration overview for WinForms and WPF
- Core concepts you actually need
- WinForms integration
- WPF integration
- Embedding preview and designer
- Exporting reports and automating output
- Customizing the designer and using a repository
- Deployment and licensing
- End-to-end example: customer reporting system
- Best practices
What a “full reporting system” actually means
In a desktop application, a complete reporting system usually includes more than just “generate a PDF.”
It typically means:
- A designer so advanced users can create or adjust report layouts without a redeploy
- A data binding model that works with your existing datasets, SQL connections, objects, XML, JSON, or custom providers
- Preview and printing inside your application
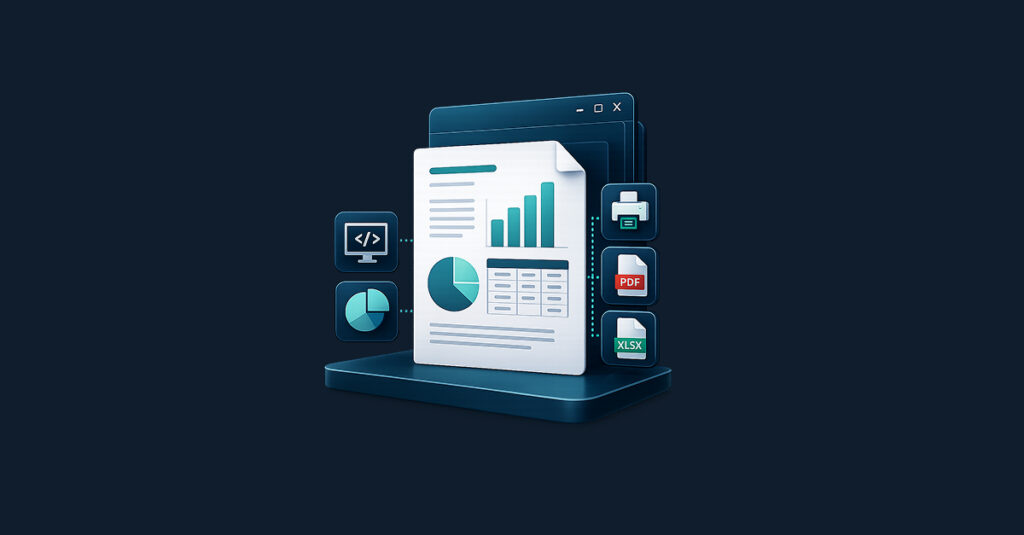
- Export to multiple formats such as PDF, Excel, Word, HTML, images, and more
- Automation for scenarios like one-click exports, background generation, email delivery, or archiving
- A deployment model that works reliably on customer machines
That is the gap List & Label is built to fill.
What List & Label does and where it fits
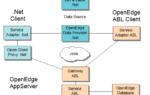
List & Label is a .NET reporting component, not a separate SaaS and not a reporting server you hand off to users. You ship it with your desktop application and call it from your code like any other library.
At runtime, responsibilities stay clearly separated:
- Your application owns authentication, authorization, navigation, and data access.
- Your data provider decides what data is available to reports.
- List & Label provides the designer, rendering engine, preview, print pipeline, and exports.
That separation matters.
A reporting system gets messy fast when the reporting layer starts reaching directly into your database or bypassing your business rules. With List & Label, your app stays the system of record and the security boundary. The reporting engine works only with what you explicitly give it.
Integration overview for WinForms and WPF
The good news is that the core integration flow is nearly identical for both UI stacks.
The usual steps are:
- Add the required List & Label assemblies or NuGet packages.
- Create and configure a
ListLabelinstance. - Bind it to a data source or data provider.
- Open the designer with
Design()when users need to build or edit a report. - Call
Print()for interactive preview/print workflows. - Call
Export()for silent or controlled exports.
That shared model makes it easy to keep reporting logic in one place, even in mixed WinForms/WPF environments.
Core concepts you actually need
The ListLabel component
The center of the integration is the ListLabel class from combit.Reporting.
It acts as the reporting engine instance for a given operation and is responsible for:
- Data binding via
DataSourceand optionallyDataMember - Report design with
Design() - Rendering and printing with
Print() - File generation with
Export() - Configuration like project file, project type, export options, preview target, and more
In practice, the cleanest pattern is usually one ListLabel instance per reporting operation.
using combit.Reporting;

using (var ll = new ListLabel())
{
    ll.LicensingInfo = "your-license-key";
    // configure data source, project, and output, see below for a full sample
}
That keeps lifetime and resource usage explicit.
Data providers and DataSource
List & Label does not connect to your database on its own. Your application is responsible for data access and passes a source into the reporting engine.
That is a good thing. It means your app still controls:
- Permissions
- Filtering
- Tenant boundaries
- Caching
- Business rules
- Naming and shaping of the report schema
You can bind many kinds of sources, including:
- ADO.NET datasets
- SQL connection flavors (SQL Server, Oracle, DB2, SQLite,…)
- XML, JSON and CSV
- Object collections
- Custom providers
For example, using SQL Server:
using combit.Reporting;
using combit.Reporting.DataProviders;
using System.Data.SqlClient;

var connection = new SqlConnection(Properties.Settings.Default.ConnectionString);
var provider = new SqlConnectionDataProvider(connection);

using (var ll = new ListLabel())
{
    ll.LicensingInfo = "your-license-key";
    ll.DataSource = provider;

    ll.Design();
}
For table-based or hierarchical data, you can also set DataMember:
ll.DataSource = CreateDataSet();
ll.DataMember = "Products";
For master-detail scenarios like invoices, you can start from the header table and expose details as related containers:
ll.DataSource = CreateDataSet();
ll.DataMember = "InvoiceHeader";
ll.AutoMasterMode = LlAutoMasterMode.AsVariables;
That pattern works well for forms, invoices, and similar document-style reports.
Project types and project files
List & Label supports project types such as lists, labels, cards, and more.
You may:
- Set the project type with
AutoProjectType - Create a new project from scratch or point to a specific project file with
AutoProjectFile
Example:
using (var ll = new ListLabel())
{
    ll.LicensingInfo = "your-license-key";
    ll.DataSource = CreateDataSet();

    ll.AutoProjectType = LlProject.List;

    ll.Design();
    ll.Print();
}
That is enough to let users design once and then reuse the same report from multiple places in your UI.
Print, preview, and export
Print() is the simplest entry point when you want users to interact with built-in preview and print workflows.
For automated output, use Export() with ExportConfiguration.
var config = new ExportConfiguration(
    LlExportTarget.Pdf,
    @"C:\output\report.pdf",
    @"Reports\MyList.lst")
{
    ShowResult = true
};

ll.Export(config);
You can also steer behavior through export options when needed, but Export() is usually the cleaner approach for silent or controlled output.
WinForms integration
Quick setup
For simple scenarios, you can add the List & Label packages, build the project, and use the Visual Studio toolbox integration. That is fine for experiments and internal tools.
For production code, it is usually better to keep most reporting configuration in code. It is easier to review, version, and test.
Runtime creation in code
A pragmatic WinForms pattern is to create short-lived ListLabel instances for specific actions such as Design, Print, or Export.
using combit.Reporting;
using combit.Reporting.DataProviders;
using System.Data.SqlClient;

public void DesignReports()
{
    using (var ll = new ListLabel())
    {
        ll.LicensingInfo = "your-license-key";

        var connection = new SqlConnection(Properties.Settings.Default.ConnectionString);
        var provider = new SqlConnectionDataProvider(connection);
        ll.DataSource = provider;

        ll.AutoProjectType = LlProject.List;

        ll.Design();
    }
}
This avoids hidden global state and keeps reporting actions isolated.
WPF integration
The engine API is the same in WPF. The difference is mainly in how you host preview and designer experiences.
A clean pattern is to place reporting logic in a service class and keep your views thin.
using combit.Reporting;

public class ReportingService
{
    private readonly string _license;

    public ReportingService(string license)
    {
        _license = license;
    }

    public void ExportCustomerListToPdf(string projectFilePath, string outputPath)
    {
        using (var ll = new ListLabel())
        {
            ll.LicensingInfo = _license;
            ll.DataSource = CreateCustomerDataSet();

            var config = new ExportConfiguration(
                LlExportTarget.Pdf,
                outputPath,
                projectFilePath)
            {
                ShowResult = true
            };

            ll.Export(config);
        }
    }
}
That same service can be used from commands, view models, or code-behind.
Embedding preview and designer
Embedded preview in WinForms
If you do not want a separate preview window, you can host List & Label’s preview control directly in your own form.
The core idea is:
- Place a preview control in your WinForms UI
- Set it as the target preview surface
- Call
Print()
A common setup looks like this:
public partial class PreviewForm : Form
{
    public PreviewForm()
    {
        InitializeComponent();
    }

    public ListLabelPreviewControl PreviewControl => listLabelPreviewControl1;

    public void ShowReport(DataSet ds, string projectPath, string license)
    {
        using (var ll = new ListLabel())
        {
            ll.LicensingInfo = license;
            ll.DataSource = ds;
            ll.AutoDestination = LlPrintMode.PreviewControl;
            ll.PreviewControl = listLabelPreviewControl1;
            ll.AutoProjectFile = projectPath;

            ll.Print();
        }

        ShowDialog();
    }
}
That gives you native preview, navigation, search, and export features without building your own viewer.
Embedded preview in WPF
In WPF, the engine stays the same. Hosting changes.
A common approach is to use a WindowsFormsHost for the preview control. That lets you keep reporting concerns separate from the rest of your WPF application while still offering an integrated preview experience.
Embedded designer
If you want the designer to live inside your application shell instead of opening in its own window, use DesignerControl in WinForms.
public partial class DesignerForm : Form
{
    private readonly ListLabel _ll;

    public DesignerForm(ListLabel ll)
    {
        InitializeComponent();
        _ll = ll;
        designerControl1.ListLabel = _ll;
    }
}
In WPF, you can host that WinForms control using WindowsFormsHost or open a dedicated WinForms dialog for designer workflows.
Exporting reports and automating output
Exports are where a reporting system usually starts becoming truly useful.
Interactive preview is great, but many desktop apps also need:
- One-click PDF creation
- Excel exports for operations teams
- Background file generation
- Archived output
- Optional email delivery
A straightforward export flow:
using (var ll = new ListLabel())
{
    ll.LicensingInfo = "your-license-key";
    ll.DataSource = CreateDataSet();

    string projectPath = @"C:\Reports\MyReport.lst";
    string exportPath  = @"C:\Exports\MyReport.pdf";

    var config = new ExportConfiguration(
        LlExportTarget.Pdf,
        exportPath,
        projectPath
    )
    {
        ShowResult = false
    };

    ll.Export(config);
}
From there, you can hand the generated file to your own application logic for archiving, uploading, or mailing.
That is often the best boundary: let List & Label render the output, then let your own code handle orchestration and compliance-sensitive workflows.
Customizing the designer and using a repository
Steering the designer
You usually do not want every user to have every design feature.
List & Label lets you adapt the designer so it feels like part of your product. Depending on your needs, that can include things like:
- Changing captions and branding
- Restricting features for non-admin users
- Hiding menu items
- Limiting export targets
- Offering different design capabilities by role
That matters in real applications. Reporting is rarely one-size-fits-all.
Using a repository for centralized project storage
At small scale, storing .lst and .lbl files on disk is fine.
At larger scale, it becomes harder to manage:
- Multiple users editing templates
- Shared assets like images or drilldown targets
- Backups
- Version consistency across machines
A repository solves that by storing projects and related assets centrally, often in a database.
From .NET, you can reference repository items by URI:
ll.AutoProjectFile = "repository://f3bd1a78-8af2-4aab-93c3-3e5b9fa9d87c";
That is often the cleanest path once reports become shared application assets rather than local developer artifacts.
Deployment and licensing
Deployment in .NET desktop apps is straightforward. In general, you ship the required List & Label assemblies and binaries with your application. You don’t need to build a separate reporting server just to add design, preview and export capabilities. Registration is also not required.
At runtime, set LicensingInfo on each ListLabel instance using your license key.
ll.LicensingInfo = "your-license-key";
Keep your production deployment aligned with the official licensing and redistribution guidance for the version you are shipping. That is especially important when building installers or distributing to customer-managed environments.
End-to-end example: customer reporting system
Assume you have a WinForms or WPF desktop app backed by SQL Server. You want users to be able to:
- Design report templates
- Preview reports inside the application
- Print reports
- Export reports to PDF
- Eventually move templates into centralized storage
Here is a practical structure.
Add packages
dotnet add package combit.ListLabel31
dotnet add package combit.ListLabel31.SqlConnectionDataProvider
Shared data provider helper
using System.Data.SqlClient;
using combit.Reporting.DataProviders;

public static class ReportingData
{
    public static SqlConnectionDataProvider CreateNorthwindProvider()
    {
        var builder = new SqlConnectionStringBuilder
        {
            DataSource     = Properties.Settings.Default.SQLServerInstance,
            UserID         = Properties.Settings.Default.SQLUser,
            Password       = Properties.Settings.Default.SQLPassword,
            InitialCatalog = "Northwind"
        };

        var connection = new SqlConnection(builder.ConnectionString);
        return new SqlConnectionDataProvider(connection);
    }
}
Central reporting service
using combit.Reporting;

public class ReportingService
{
    private readonly string _license;

    public ReportingService(string license)
    {
        _license = license;
    }

    private ListLabel CreateListLabel(object dataSource)
    {
        return new ListLabel
        {
            LicensingInfo = _license,
            DataSource = dataSource
        };
    }

    public void DesignReport(string projectPath, object dataSource)
    {
        using var ll = CreateListLabel(dataSource);
        ll.AutoProjectFile = projectPath;
        ll.Design();
    }

    public void PrintReport(string projectPath, object dataSource)
    {
        using var ll = CreateListLabel(dataSource);
        ll.AutoProjectFile = projectPath;
        ll.Print();
    }

    public void ExportReport(string projectPath, object dataSource, LlExportTarget target, string exportPath)
    {
        using var ll = CreateListLabel(dataSource);
        var config = new ExportConfiguration(target, exportPath, projectPath)
        {
            ShowResult = true
        };
        ll.Export(config);
    }
}
Design reports
private void btnDesignReports_Click(object sender, EventArgs e)
{
    var service = new ReportingService("your-license-key");
    service.DesignReport(@"Reports\CustomerList.lst", ReportingData.CreateNorthwindProvider());
}
Print reports
private void btnPrintReport_Click(object sender, EventArgs e)
{
    var service = new ReportingService("your-license-key");
    service.PrintReport(@"Reports\CustomerList.lst", ReportingData.CreateNorthwindProvider());
}
Export reports to PDF
private void btnExportPdf_Click(object sender, EventArgs e)
{
    var service = new ReportingService("your-license-key");
    service.ExportReport(
        @"Reports\CustomerList.lst",
        ReportingData.CreateNorthwindProvider(),
        LlExportTarget.Pdf,
        @"C:\Exports\CustomerList.pdf");
}
Move to repository-based templates later
Once local files start getting messy, switch from file paths to repository URIs:
ll.AutoProjectFile = "repository://f3bd1a78-8af2-4aab-93c3-3e5b9fa9d87c";
That is a clean migration path from “we have a few report files” to “reporting is now a shared feature in the product.”
Best practices
Once the basics work, a few patterns make the reporting layer easier to live with.
- Use short-lived
ListLabelinstances for specific operations. To speed up DLL loading and resource caching, keep one global instance alive forever. - Keep data access in your app, not in report definitions, so permissions and business rules stay centralized.
- Expose a domain-friendly schema so report designers see field names that make sense to business users.
- Centralize engine setup in a service to avoid repeating licensing, provider wiring, and default settings all over the UI.
- Start simple with one provider, one template, and
Design()plusPrint(), then add silent exports, embedded preview, repository storage, parameters, and drilldown as needed. - Store templates outside your binaries so report changes do not require a full application rebuild.
- Use built-in controls for preview and design when possible instead of rebuilding that UI yourself.
The biggest win here is not just fewer lines of code. It is avoiding the long-term cost of inventing your own reporting subsystem.
Conclusion
A full reporting system in a desktop app is not just about rendering documents. It is about giving users a controlled way to design, preview, print, and export reports without ending up either with a reporting framework you have to maintain yourself or a basic tool you outgrow once requirements become more complex.
That is where List & Label fits well.
Your application keeps control over data, permissions, and workflow. List & Label handles the reporting engine, design surface, preview, and output formats. That division of responsibility keeps the integration small, predictable, and reusable across both WinForms and WPF.
If you are building a desktop business application and your reporting requirements keep expanding, this is usually the point where a mature reporting component costs less than building and maintaining the same stack yourself or working around the limits of a basic reporting tool. You can find more information on both topics in our dev guides Build or Buy – Why CTOs choose List & Label and Stop outgrowing your .NET reporting: How to avoid “We have to rewrite this”.
FAQ
List & Label is a .NET reporting component that embeds design, rendering, preview, print, and export capabilities directly into your application.
Yes. The reporting engine API is the same for both. The main difference is how preview and designer controls are hosted.
Yes, depending on the version you are using and its supported targets. Check the version-specific documentation for exact support details.
No. Your application is responsible for data access and passes data into the reporting engine.
Yes. In WinForms, you can use the built-in preview and designer controls directly. In WPF, these can be hosted through WindowsFormsHost or launched from dedicated WinForms windows.

Leading the development at combit as Managing Director. Microsoft .NET enthusiast driving innovation & agile project management. Used to be a physicist in my first life. I love hiking and vanlife.