Installing Report Server on an Azure Instance
First, you need to have a Report Server instance that is accessible from the outside. As we’re planning to use it from Azure anyways, it makes sense to install it in a Windows Docker image and deploy it to Azure Container Instances. These tutorials will help you getting started:
- Deploy Report Server in a Windows Docker Container
- Deploy a container application to Azure Container Instances
Using Data from Azure SQL
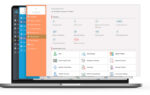
Of course, the Report Server can easily consume data from Azure SQL datasources. For this test – and just to make sure we’re using everything that’s available in Azure – I deployed an instance of the notorious Northwind database to Azure. Connecting to it is easy – just add a new Azure SQL data source and set its basic properties as follows:

Next, create a new report based on this datasource:

Accessing the Report Server via REST from an Azure Function
The final link in the chain now is to use this Report Server instance and report from an Azure Function. Of course, this function can also take parameters and forward them as report parameters to the server. For this purpose, create an http-triggered function instance:

Make sure you set the Authorization level to Anonymous here for ease of use. If you choose the default level of Function, you’re required to present the function key in requests to access your function endpoint.
Visual Studio creates a project and class that contains boilerplate code for the HTTP trigger function type. The boilerplate code sends an HTTP response that includes a value from the request body or query string. The HttpTrigger attribute specifies that the function is triggered by an HTTP request.
To rename the function, just change the FunctionName method attribute to whatever is required:
- In File Explorer, right-click the Function1.cs file and rename it to CreateRSReport.cs.
- In the code, rename the Function1 class to CreateRSReport.
- In the HttpTrigger method named Run, rename the FunctionName method attribute to CreateRSReport.
Your function definition should now look like the following code:
 [FunctionName("CreateRSReport")]
  public static async Task<IActionResult> Run(
            [HttpTrigger(AuthorizationLevel.Anonymous, "get", "post", Route = null)] HttpRequest req,
            ILogger log)
Now, make sure to activate the REST API in the Report Server via “Management > Advanced settings > REST API” before use. You can find a quick start here. Also, if you want to browse the API, make sure to activate the Swagger documentation via “Management > Advanced Settings > REST API > Activate specification by Swagger / OpenAPI” and clicking on “Display REST API documentation”.

Then, create an API account with token:
- Create a user ‘apiuser’ in the user administration and during “Configure registration”, choose the authentication type “API account with token” and confirm by choosing “continue”.
- Generate and define a new client token with “Apply”. Copy this token. The token cannot be displayed again. If you generate a new token, then the token used so far will become invalid and all clients will need to be reconfigured!
With this, you can now connect to the Report Server from your Azure function as follows:
using combit.ReportServer.ClientApi;
using combit.ReportServer.ClientApi.Objects;

// Create a connection to the Report Server
ReportServerClient rsClient = await ReportServer.ConnectAsync("http://.../combitreportserver",
new ClientOptions()
{
Authentication = new ApiTokenAuthentication("apiuser", "...")
});
The next step is to retrieve the report ID of the report you want to export. The easiest way is to just edit the report template in the Report Server and copy its ID from the URL:

Using the report template ID, you can export the report e.g. to PDF from your function:
...
// Set Report Template ID
string reportTemplateId = "FEF8ED98-52C5-4A95-AAF9-F03B5069DA75";

// With null as export profile, the default export profile of the report template will be used
string exportProfileId = null;

// Prepare an export and set the options:
PreparedReport preparedExport = rsClient.Exporter.PrepareExport(reportTemplateId, exportProfileId);
preparedExport.DisableCaching = true;

// Set export path
string exportPath = Path.GetTempPath();

// Query parameter for Report Parameter Category
string id = req.Query["Category"];

// Add Report Parameters
preparedExport.ReportParameters.Add("Category", id);

// Exports the report and download the export file
ExportResult result = await preparedExport.ExportAsync();
await result.DownloadFilesAsync(exportPath, CancellationToken.None);

return new FileContentResult (System.IO.File.ReadAllBytes(Path.Combine(Path.GetTempPath(), "azure_test.pdf")), "application/pdf");
...
Test the Azure function locally
Visual Studio integrates with Azure Functions Core Tools. This allows to easily debug Azure Functions locally. Just hit F5 in Visual Studio to give it a try, and make sure the firewall is configured to allow the tools to handle HTTP requests. With this local server up and running, you can then test your function – either from a browser or from within a test application:
var client = new HttpClient();
var url = "http://localhost:7071/api/CreateRSReport?Category=2";
HttpResponseMessage response = await client.GetAsync(url);
Once you’re happy with the result, you can deploy your function to Azure. In Solution Explorer, right-click the project and select Publish. For Target, select Azure and then Next. Then, choose an existing Function App, or create a new one:

Then publish:

If you now open your URL and function, you will receive the PDF download as expected from the newly created Azure Function.

Leading the development at combit as Managing Director. Microsoft .NET enthusiast driving innovation & agile project management. Used to be a physicist in my first life. I love hiking and vanlife.


Hi,
Do you have any tutorials to deploy Report Server at AWS docker container?
Unfortunately, no – it is possible to host Windows based docker images on Amazon-EC2, so it _should_ be straight forward. However we haven’t tested Report Server deployment to Amazon AWS yet. To get started, you should follow https://forum.combit.net/t/deploy-report-server-in-a-windows-docker-container. Then, https://docs.aws.amazon.com/AmazonECS/latest/userguide/Windows_fargate-getting_started.html seems to be a decent tutorial to get this container up and running on Amazon AWS Fargate. Let me know if something doesn’t work and we’ll check it out for you.